• Home
  • Latest news
  • WinWerth® Artefact Corrections – overview of the novelties
learn more
News on computed tomography

WinWerth® Artefact Corrections

WinWerth® Artefact Corrections – overview of the novelties

When measuring with computed tomography, systematic measurement errors, known as artefacts, occur in the volume. Correction methods integrated into the WinWerth® measurement software can greatly reduce artefacts and increase measurement accuracy accordingly.

The empirical artifact correction EAK is a proven method for reducing artifacts caused by beam hardening and scattered radiation. For measurement objects of one material and one density, the relationship between the attenuation of X-ray radiation by the measurement object and the transmitted length can be described by a characteristic curve. This relationship is determined experimentally on a calibrated material sample or on the workpiece itself. The characteristic curve can be used in a subsequent measurement to strongly reduce beam hardening and some scattered beam artifacts. This method has proven itself over many years in application, but reaches its limits for some tasks. Newer methods described below allow the specific reduction of artifacts caused by different physical effects.


WinWerth® Artefact Corrections – overview of the novelties

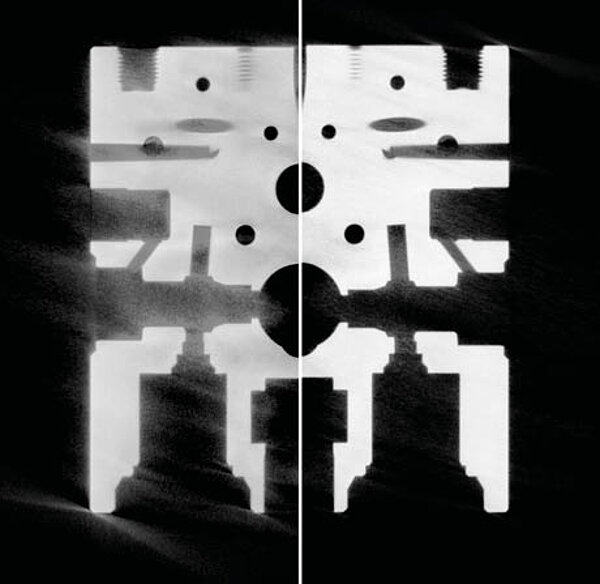
Empirical artifact correction: volume without (left) and with correction (right)

Large and dense workpieces

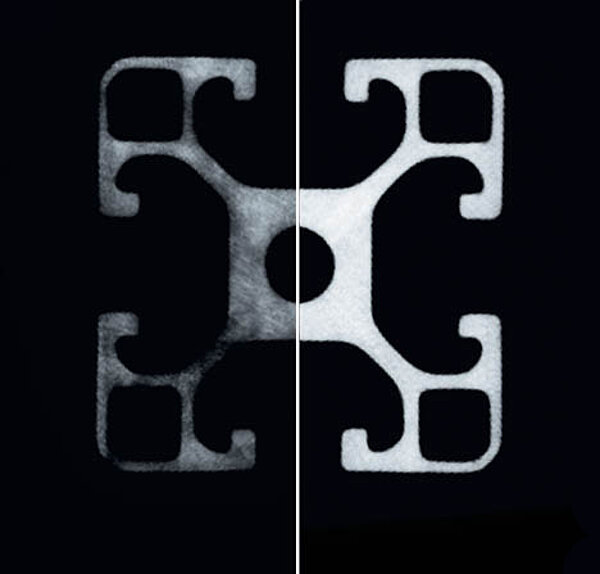
Scattered radiation generated in the measured object causes falsified intensity values to be measured, resulting in artifacts in the volume. These scattered radiation artifacts are simulated using a volume from a master part measurement and then used to correct the volume.

Scattered radiation results from scattering of X-ray photons in the workpiece due to the Compton effect. This occurs in particular during tomography of relatively large objects made of dense materials that are difficult to penetrate. At low magnifications or short distances between the target and the detector, a larger part of the resulting scattered radiation is detected. The main application of scattering artifact correction is therefore the reduction of systematic measurement errors when measuring large objects made of highly attenuating materials, for example, large turbine blades, engine blocks and gearbox housings.


WinWerth® Artefact Corrections – overview of the novelties

Scattering artifact correction: volume without (left) and with correction (right)

Large cone beam angle

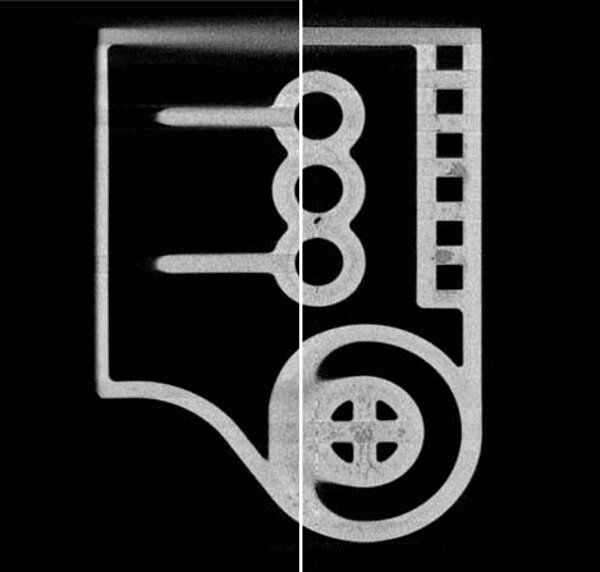
Tomography with a cone-shaped X-ray beam enables short measuring times by simultaneously detecting large areas of the workpiece. However, as the cone beam angle increases, the workpiece is scanned more poorly. A patented method can be used to simulate the resulting cone beam artifacts on the target geometry and apply them to correct the measurement volume.

The correction can be calculated by simulation on the CAD model or on a point cloud of a master part measurement of the workpiece. Once calculated, the correction is applicable to point clouds of the same workpiece or further workpieces of the same type, e.g., in a series measurement. Volumes can also be corrected. The calculation of the correction is based on a simulation on a point cloud of the measured workpiece.

By measuring with a larger cone beam angle, it is possible to reduce the measurement time for the same repeatability or to improve the repeatability for the same measurement time. This is achieved by using a larger part of the available radiation energy, for example by reducing the focus-detector distance (FDD) at the same imaging scale. The cone beam artifacts and the resulting systematic measurement errors can be greatly reduced by using cone beam artifact correction.
 

WinWerth® Artefact Corrections – overview of the novelties

Cone beam artifact correction: volume without (left) and with correction (right)

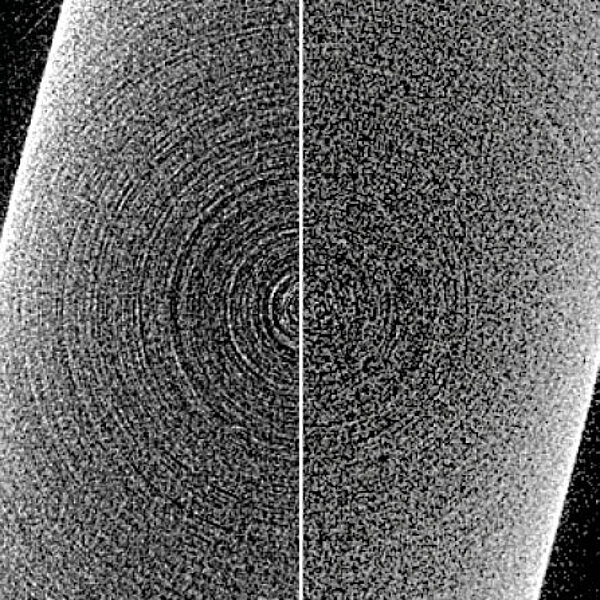
Ring artifacts when measuring low attenuating materials

The sensitivity determines the conversion of X-ray radiation into a measured intensity. Due to not fully corrected sensitivity differences, the same radiation intensity at two neighboring pixels leads to darker or lighter gray values, respectively. Back-projection of these differences in all rotational positions results in ring-shaped artifacts in the reconstructed volume.

With the new WinWerth® ring artifact correction, the information contained in the intensity images about the sensitivity differences between the pixels is determined from the current measurement and used for fine correction of the images. In the volume reconstructed from this, the ring artifacts are greatly reduced. These are more noticeable in the case of weakly absorbing workpieces. For this reason, the use of this correction method is particularly useful for measurements of workpieces with a low attenuation capability, such as micro-gears made of plastic, material samples of foam materials or lens packages for smartphones..
 

WinWerth® Artefact Corrections – overview of the novelties

Ring artifact correction: volume without (left) and with correction (right)

Further information:

Computed tomography

Contact
Select another country or region to see content in your language.